*cherish*love*joy*

*cherish*love*joy*

Wednesday, June 22, 2011

Pretty. Easy. Cake.

I for one, LOVE cake... and I'm sure I'm not alone! I also love PRETTY cakes and have wanted SO badly to make one but I don't have my own decorating tips and typically try not to eat much cake in order not to gain 100 pounds... haha.

A couple weeks ago, my mom asked me if I'd make my grandma's birthday cake and I got SO excited about making it that I started to overload my brain with all of the possibilities! I decided not to make the cake batter from scratch though, since I'm kind of new at this whole "from scratch" thing anyhow and I don't know how my own would turn out.

So I went to the store and bought a Duncan Hines marble cake mix. I figured it would be a crowd pleaser :). Then I baked the cake as directed on the box.


I made it almost like a tiger striped effect just for fun too, not that you could really tell when you cut into it but it still looked cool ;-)

I placed one 9 inch round cake on the bottom of my cake holder and trimmed the top so it was flat.
Then I made a filling to go between the layers. I love raspberry so I bought Smuckers "Simply Fruit" seedless red raspberry spreadable fruit....

but that didn't seem like enough pizzazz...

So I ground up some mini semi-sweet chocolate chips with a coffee grinder to make them even smaller and mixed them into the raspberry filling which gave it a little texture. Plus who doesn't love raspberry and chocolate together?! 
Side note; chill your chocolate chips in the fridge or freezer before doing this so they don't warm up and get all goey in your coffee grinder ;-)

Next I made butter cream frosting!
I found the recipe at www.cooks.com;
VANILLA BUTTERCREAM FROSTING

1 package powdered sugar (16 ounces)
1/2 cup butter, softened (1 stick)
3 tablespoons milk
2 teaspoons vanilla

Beat sugar, butter, milk and vanilla with electric mixer at low speed until well blended and smooth. If frosting becomes too thick, beat in additional milk by teaspoonfuls until the frosting is of spreading consistency.Makes about 2 1/2 cups frosting.
Submitted by: E.J.H.


I doubled the recipe because I wasn't sure how much frosting I'd need, which was good because I did end up needing a bit more than the one batch and I also got to practice writing with the decorating tips I borrowed from one of my bestest friends :) Thanks Cait!!

Another great tip I got from Cait, is if you want your frosting to be white, buy CLEAR VANILLA! It worked great!

Oh and I should also mention, I chose this buttercream frosting recipe because originally I had thought about using fondant, but after looking at the price and finding out from a Micheal's employee that it doesn't actually have much of a taste and is kind of chalky, I decided against it.

Buttercream however is a great alternative to fondant because there are techniques to making it smooth which I will share below. In the future though, when I have time, I'd love to learn how to work with fondant and maybe see if I could add some flavoring or something to experiment! (Don't worry I'll be sure to blog it haha)

I went to Micheal's craft store to buy a set of 12 Wilton disposable decorating bags as seen in the background of the last few pictures. Those bags make clean-up a breeze! I believe they were approx. $5!

Next you can see that I assembled a frosting bag with decorating tip and put in some of the buttercream frosting to be able to pipe the frosting around the outside of the first 9" round cake. This ensures that the filling does not drip out of the sides.

So the filling doesn't exactly look super appetizing from this angle, but I assure you it is delicious! 

Next I placed the second layer on top but placed it upside down since I knew the bottom was really flat and I wouldn't have to cut it and risk messing up :) It worked well! I filled in the gaps in the middle with a little extra frosting in the decorating bag then squeezed the rest of the frosting out on top of the cake to spread it and frost the top and sides. 
As you can see above, the frosting does not look smooth, and smooth is what I wanted because I like the look of fondant. So I went to youtube.com to find videos on how to smooth buttercream frosting. I learned that with a little time and parchment paper (or wax paper) you can make it look great! 

First I put my frosted cake in the refrigerator to set the buttercream until it started to flake. Then I took about a foot of parchment paper and cut it in half, I used a piece to start smoothing down the edges. The warmth of your hand starts smoothing the frosting through the paper, but you have to be careful!

 If you start smoothing before it's cold enough, you'll have a sticky mess. If you're smoothing and you start to notice the frosting sticking to the parchment paper, put it back in the fridge to cool some more. Wait about 5-10 minutes before you smooth again. Repeat these steps a few times until your cake is to it's desired smoothness! 

Here you can see it's starting to smooth out nicely!


 While the cake was cooling in the fridge between smoothing sessions, I took some parchment paper and decided to start playing around with lettering and designs!
As you can see my grandma's name is Barbara :) I am so glad I did this ahead of time to get an idea of how fast the frosting comes out and how to recover if you get air bubbles! 

I chose to color the frosting accents pink for writing and green for details

For the bottom I actually went through and tried out a few different tips on the parchment paper until I found the one I liked. I also LOVE these little five dot flowers in pink because they are so easy and cute! I decided to put one flower in the middle of each "slice" according to the cake holder. You can see the lines on the bottom that I used as a guide.
I added the green swirly vines... then the lettering!
Now you're probably wondering why I did not center the lettering...? Well during my trip to Micheal's I was trying to find a cute shoe figurine to place on top of the cake since my grandma collects those little fancy shoes you find at the Hallmark stores. I tried a few different stores and I couldn't find one!! So instead, I saw this white "B" hook on sale for $1!
I took out the screws and hanging hooks in the back so I could paint it.

I also bent the hook at the bottom so that the white metal was straight (for the most part) and I could stick it into the cake for decoration! 
Brad went out for me, the sweetheart that he is, and bought a can of glossy pink spray paint for a couple of dollars at the hardware store AND he even painted it for me as I was finishing the decorating process! How nice was that!? :)  He even wanted to put a third coat on it before we left for the party, but I talked him out of that seeing as I didn't want paint on the cake ;-) haha

So here's the finished product!! 


Happy Birthday Grandma!!

The cake was a hit at the campground party with our family! I was so happy to be able to make my grandma's cake for her and most of all to spend some quality family time with everyone! 

Thanks for reading! Sorry for not posting much lately, I come and go in waves sometimes :) hehe

Tuesday, June 21, 2011

Struggling SAHM

The "Stay At Home MOM"

 I hear so many mother's {or hope-to-be mother's some day} say they want to be one, and I'm sure there are some that honestly do without having a case of the 'grass is greener' because they happen to be working. "Oh to be able to have the time to teach your children and savor every moment as they grow!!" It definitely is amazing in those aspects, but is it for everyone? I can only answer if it is for me or not, and it may surprise you to know... it isn't.

Now don't get me wrong... I love my children, my family, and I'm grateful for everything we have. Life is amazing and we're blessed in more ways than I can count! The problem I'm having, is that I have daily internal struggles when it comes to a feeling of accomplishment. For those of you who have a job outside of the home and a family to come home to, I ask;

Do you have a sense of accomplishment at work?

Even if you are not working your "ideal" job, or don't make as much money as you'd like/need... Have you worked hard through college to attain the job you have now? Do you do something you enjoy? Do you have moments at work that make you feel like you've done something that deserves an 'atta boy' (or girl)?  Do you get to make people smile? Does your job involve helping people even if it is indirectly? Do you get any sort of praise even if it's every once-in-a-blue-moon (like from a boss or co-worker)? If so, you probably feel a sense of accomplishment at work.

When you're a SAHM like me, your day doesn't change very much on a regular basis. Since structure is a necessity for growing children (and for my own sanity) we stick to a basic schedule.

Our typical Day; (times vary of course but this is for visual sake)

6am - Addie's 1st Feeding
8am - Braedyn wakes
8:10am - Potty Braedyn
8:20am - Eat breakfast
9am - Change clothes/diapers
10am-11:30am - Activity/cleaning
Noon - Lunch/Feed
12:45 - Potty/diaper change
1pm- 3pm - Nap(mommy-time IF Addie sleeps)
3:10pm - Potty Braedyn
3:20pm - Snack
3:30pm- 5pm - Activity/Exercise
5pm - Prepare Supper
5:30-6pm - Eat/Feed
7pm - Ready for bed/Reading
8pm - Bedtime

  Sure we deviate from our usual activities and get to have fun filled play-dates, walks to the park, trips to see family, library book check outs, etc... but the reality is, your children are not typically going to turn around to you and say,

"Hey mom, I see that you really broke a sweat going up and down the stairs with 5 loads of laundry today while running after me and baby sister as lunch was baking before you could enjoy your "morning" cup of coffee this afternoon, and I just wanted to say I appreciate you!"

Now I'm not trying to be a "Negative Nancy" here... because my children also give me a lot of joy and an enormous amount of love more times than I can count in one day and I'm extremely proud to be their mother! What I am however getting at, is that this whole SAHM thing is really a very difficult thing to do. It's especially difficult if you have a perspective like mine. I wish that I felt the same sense of accomplishment being home every day teaching my children, as I would feel doing a specified "job" outside of the home where I was earning a paycheck... but I don't feel the same way about the two. I happen to be the type of person who feels I can be a better parent to my children when I have my own time outside of the house to work toward something that makes me feel accomplished.

 For example, I have gotten an immense amount of gratification from doing one of the most difficult and underpaid jobs out there (in my opinion)... care-giving. If I made one person smile during an 8 hour (or longer) shift on my feet running my buns off, I was happy to go home knowing that I made a difference in that person's day. I just have that need to feel like I'm making a difference in the world as well as my own home... and I'm sure I will find new ways of doing this as my own life takes it's twists and turns. In the future, I hope to be able to do a balancing act of working and being a good parent, but for now I will be making the best of life as it has happened. I just have to focus on the fact that I AM doing something amazing!  Being a SAHM is a very difficult job that just doesn't get the recognition that a job outside of the home gets most times.

The reality of my situation is that life in our family, wasn't planned this way... it happened this way. It's a miraculous and wonderful life that we share, but it's difficult... as it is for all of us grown-ups {wait, grown ups? ...when did that happen? :)}. What we are doing in our family, is exactly what everyone else is trying to do regardless of each of our different circumstances... get by to the next day; happy, healthy, and with an ounce of sanity. We're growing and learning with each mistake and new moment together. I'm so lucky to have an amazing man by my side, who helps me through it all, who I'm able to have great conversations with, who can turn my stubborn attitude around, and who I love more every day.

So here's to making the best of every day, and finding the happiness in life ... even when it doesn't go as you planned it. Everything happens for a reason. :)

This is my day-late party link up for Tuesday's "Help a momma out" :)

Tuesday, June 14, 2011

"Help A Momma Out Tuesday's" - Link up with J&M's Eye Candy!

It's that time again for J&M's Eye Candy's 
 "Help a Momma Out Tuesday!" 


This is  my personal blog which I like to keep separate from the kids' so that I have my own space :) 
Visit www.shortpants-littlemiss.blogspot.com for an "all-about the kidlets" page!

Read on to find out how you can put together a DIY pedicure party for that relaxation that you deserve! A pedicure, healthy dinner recipe, AND fun adult beverage recipe make for a great {and inexpensive} night in with the girls!
 Also, for tips on how to save money with babies and toddlers, make sure to read my first edition of 
 "SUPER Baby Food - Tips and More!"
I'm a little behind on new updates from the award winning book {Super Baby Food by Ruth Yaron} but I'll be working on the second edition soon! Edition one has easy tips on how to save on the cost of wipes and diaper creams! 

Thanks for stopping in! :) ...and don't forget to 

VISIT J&M's Eye Candy on Etsy too!! 

Their shop is SUPER cute!!!


Wednesday, June 8, 2011

DIY Pedicure Night!!

Need a little pampering but don't feel like spending a quarter of your grocery bill on your feet? 

Have a DIY pedicure party! 

It's finally summer and most of us wouldn't mind sporting the sandals and flip flops

BUT 

I took a look at my feet and almost collapsed they were so hideous

Okay, not really... but they were VERY dry, cracked, nails were chipping, cuticles were overgrown, and my paint job that I 'touched up' the last five times just didn't have that professional look that I crave. :) 

My girlfriends and I have had a lot of our own at-home spa sessions in the past, so I have a good amount of supplies in stock. All I needed was a quick trip to our local dollar store and a little creativity to make this one even more like you're visiting a SPA!  

** Mel's Pedicure Spa **

So even though I've had a lot of pedicure nights in my past, this one was special because of the little added touches...


This is exciting because if you decide to do something like this on your own, you can create so many of your own personal touches just by finding things you already have around your home. For me, I like arts and crafts and always save things like tissue paper, ribbon, and gift bags. 

First I thought, how many people will be coming, and do I have the necessary supplies? I of course do not want people to use each other's pedicure tools, YUCK... so I made a quick run to the dollar store and picked up some cute, colorful, and inexpensive tools. I picked up foot files (I call it the 'cheese grater tool'), nail clippers that happened to be decorated in the shapes of little feet :), colorful toe separators, nail files, and a bag of Epsom salt in lavender scent. 

I wish I would have taken more pictures of how the little gifts turned out, but you'll get the general idea.


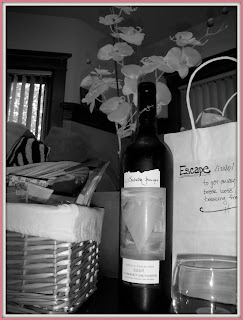
I put each set of tools into 4 plain white gift bags. Then I placed a small amount of Epsom salt in 4 small decorative bags cinched with ribbon and put them along with each set of tools in the bags. On the back of each bag I pinned a package of wild flowers with mini clothespins. I placed tissue paper inside and wrote a simple dictionary definition of 'spa-like' words on each bag in black marker. For example, I used the words Pamper, Relax, Rejuvenate, and Escape. Just something that simple can make a statement!

Next I rolled my most colorful towels up and placed them in a fun basket. ( I know at the spa you'd use white towels, but I thought it would be more fun to spice it up a bit! Plus I don't have more than one or two white towels haha)

Don't forget to CHILL a bottle of wine or your favorite and most relaxing beverage! 


I also organized my foot scrubs, lotions, heal creams, cuticle oil, etc... in a decorative basket and placed my nail polish colors and nail polish remover in another container. 


Above, you can see I also found a couple of different sized canning jars which I think add a nice touch instead of just having bags of cotton balls and cotton rounds lying out. You could also choose to add some ribbon to the rims of the canning jars for a little extra :) 

From previous spa nights with the girls, I do happen to have multiple tubs lying around for foot soaking. We actually bought them from the household cleaning sections of WalMart or Target since they are usually used inside your sink for washing dishes, but they served our purpose very well! 


Before we started pampering our feet however, we did eat a healthy dinner first! Since it was a blistering 87 degrees and humid I chose not to use my oven to bake chicken breasts. Here's my own made up recipe below;

Mel's Catalina Chicken
3 large boneless skinless chicken breasts; thawed
1cup Kraft Light Catalina salad dressing
2 tablespoons Italian seasoning
dash of salt
dash of pepper
1cup baby carrots
1/2 cup chopped red onion

Place all ingredients in crockpot, turn on low for 4 to 5 hours. Mix every 30 minutes to an hour. 

I served the chicken with carrots, salad & choice of dressing, grapes, and strawberries. After our tummies were satisfied, we filled our tubs with warm-hot water (based on preference), added our lavender bath salt, and SOAKED our feet! 


Oh and I almost forgot! I threw together a "sangria-like" drink based on what I had available and a delicious drink that Michelle made for us at a previous Glee night ;-) Thanks Michelle!! 


I took a 2 quart pitcher, filled a quarter of the pitcher with wine, a quarter with sprite, and the rest with a white grape juice. I also squeezed in fresh orange juice and threw in some thinly sliced oranges. After chilling for an hour it was perfect! For not having any recipes this day, I think it turned out well :)  

During our pedicures, we first soaked our feet and relaxed with some trashy TV ;-) then used a foot scrub. After rinsing off the foot scrub we used our grater tool on our heels and rough dry spots. There's also a fine end that's like a nail file to smooth the skin afterward. After grating, we used heel creams and super moisturizing lotions to massage into our feet. We cleaned up and clipped our nails, took off existing polish, and painted! It's so much fun to get together with some of your favorite girls to laugh, chat, eat, and pamper yourselves! 

Try this at home for an instant stress reliever!! 

As always, thanks for stopping by! Happy Summer :)

Wednesday, June 1, 2011

"SUPER Baby Food" - Tips and more! *edition one*

I'm starting a new edition to my blog because I'm SO excited about this new book I've been obsessing over! Thanks to a friend of ours, we got to borrow this wonderful book called, "Super Baby Food" by Ruth Yaron (Thanks Jody!). It has a substantial amount of information for parents of babies and toddlers emphasizing on how make your own baby food. It teaches parents about nutrition at a whole new level with the chapter titled, "Nutrition 101; A crash course in nutrition". It does a great job of breaking down the information so you can better understand what foods to pair together and in what amounts to keep your kids eating well.


 In my opinion, this book not only educates parents on how to nourish your children with organic food for less, but it gives you the tools to teach your children right from the very beginning that it is incredibly important to eat well and lead a healthy lifestyle. It also has chapters where it gives recipes for baby-safe household cleaners and baby products which could save a substantial amount of money! I will choose a segment out of the book to share every week or so, and hope to add in pictures too :) 


I hope these tips can help your family live healthy and save money too! 

Our first focus this week is homemade baby products!!

So I'll be the first to admit that I am not up for trying cloth diapers... I would rather budget our money to be able to use disposable diapers and try to save money elsewhere. So instead, I am trying my hand at making my own baby wipes AND using alternatives to expensive diaper creams!

Homemade BABY WIPES;

For the liquid mixture;
two cups water
two tablespoons baby oil
two tablespoons of either baby shampoo or baby wash
a tablespoon or two of aloe gel squeezed from a houseplant (optional)
7-8 drops lavender oil (can be found at a natural food store) which also kills bacteria! (optional) Smells nice!

For the disposable baby wipes;
Cut a roll of paper towel in half with a sharp non-serrated knife (serrated knives will create a rough edge with bits of paper toweling all over). Use a strong brand that is more like cloth, for example, Kleenex Viva paper towels are strong and tend to be reusable depending on the mess. Bounty (plain white) quilted would also work. Remove the inside tube core with a pliers. Use one half roll of paper towel per batch. Place a half roll into a cylindrical container. Make two cups of the liquid mixture above, pour into container and cover. Turn upside down to saturate paper towels. Let sit about fifteen minutes.

Pull the first towel out from the inside of the roll. If you are re-using a wipes container that has the hole in the top, pull towel through top for easy access. If you are using a homemade container or Tupperware container, use a sharp knife to cut an X in the lid. Cut a little bit off of the inside corners of the X to make a small hole ensuring that the wipes will not shred. I'm using an empty formula container :)

If you are looking to use individual paper towels that come in stacks, (like the ones that come out of public restroom dispensers - the white ones though, not the brown 'paper-bag-like' ones) you may wish to order them from a restaurant or medical supply store.

The following link has white folded paper towels listed at $1.98 per pack of 150, but of course if you buy in higher quantities the price goes down significantly.
http://www.webstaurantstore.com/505/folded-paper-towels.html


So you could spend $13.69 for generic (Up & Up brand) wipes at Target and get 792 wipes. 
OR


You could spend $15.49 for a case of white multi-fold paper towels in stacks and get 4000 wipes out of it!! That's 5x more wipes than what you'd get buying generic Target wipes! Use the recipe above and place them in a re-usable rectangular wipes box with the pop-up lid for easy access and you're all set! 

Read on for more exciting tips!! 


For Diaper Rash;


This one surprised me! Do you have Crisco in your cupboard? It's not just for baking!! haha It works as a preventative barrier to wetness and acidity. Apply as soon as you notice your baby developing a diaper rash (which seems to happen much more in the summer months now too!). If the area is too tender to baby's touch, try applying it directly into the diaper instead for a painless application. 


Any breastfeeding mothers out there!? Did you know that your breast milk can also be applied to baby's diaper rash to soothe and clear up his or her skin? 


If you have an aloe house plant, you can squeeze a small amount out to apply to baby's bottom too!


Also, in a bath it works nicely to add a few tablespoons of baking soda to neutralize the acidity of the diaper rash and soothe baby's skin.

Potty training? Your toddler is bound to get diaper rash even without the diaper! Fill your bathroom sink with comfortably warm water and a few tablespoons of baking soda. Submerge a washcloth in the water, ring it out, and wipe your kidlet clean! This also helps get rid of the urine smell after accidents and between bathing! 


Thanks for stopping in to read the latest! Like I said, I'm not taking credit for these wonderful tips, but I am sharing them from an amazing book called, 'Super Baby Food' by Ruth Yaron. Stay tuned for more :) and be sure to comment with any questions or requests!